


Easy Lavender Drawing with 4 Steps: How to Paint Ceramic
Lavender drawing on glass or ceramic surfaces with Acrylic Paint Pens is not just an art project; it's a delightful journey into the world of "ceramic painting" that brings a unique blend of creativity and serenity to your crafting table. This guide is tailored to inspire both beginners and seasoned artists alike, offering "easy ceramic painting ideas" that are both engaging and fulfilling. By the end of this tutorial, you will not only have mastered the technique of "how to paint ceramic" but also created a beautiful piece of art that captures the essence of lavender's tranquil beauty.
Embracing the Lavender Theme
Lavender is more than just a plant; it's a symbol of peace, serenity, and natural beauty. Its delicate purple hues and graceful form make it a perfect subject for "lavender drawing," especially on the unique canvas that ceramic provides. "Can you paint ceramic?" you might wonder. Absolutely, and doing so with a theme as charming as lavender allows you to bring a piece of the serene outdoors into your home.
Preparing Your Canvas and Materials
Before we dive into the brush strokes and color blending, let's talk about preparation. Yes, "can you paint ceramic" with any paint? The answer is nuanced, but for the purposes of this guide, acrylic paint pens are your best friend. They offer precision, a vast spectrum of colors, and the ease of use needed for detailed work such as lavender drawing. Ensure your ceramic piece is clean and dry to create a perfect canvas for your artwork.
Step-by-Step Lavender Drawing on Ceramic
Step 1: Shake the Pen
Start by preparing your acrylic paint pens. A good shake ensures the paint is well mixed, guaranteeing smooth application and vibrant color from the get-go.

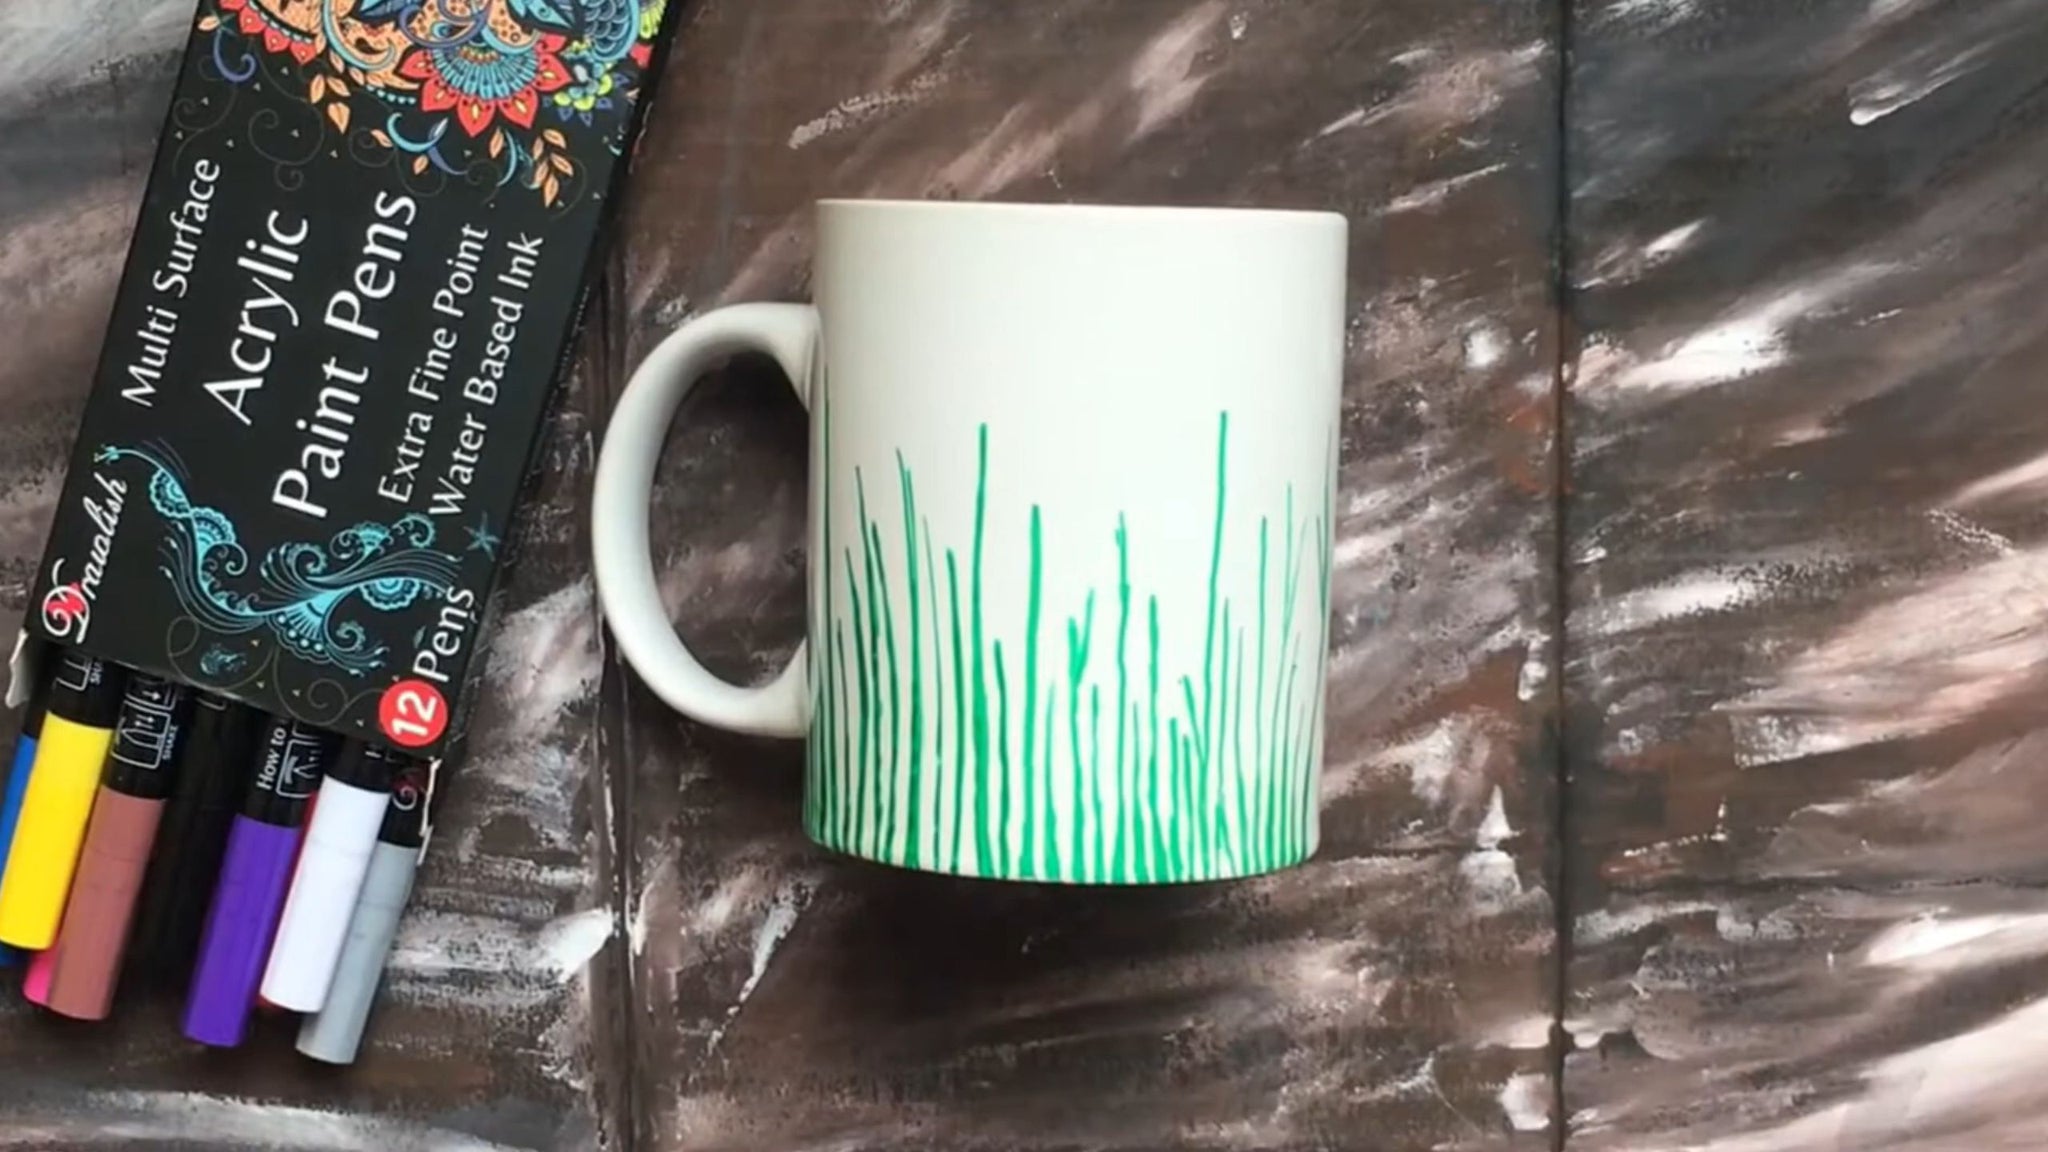
Step 2: Draw the Green Vertical Lines
The foundation of your "lavender drawing" begins with the stems. Use a green acrylic paint pen to draw thin, vertical lines. These lines should have a slight curve, mimicking the natural grace of lavender stems. This step introduces the vivid green that beautifully contrasts with the purple blooms you'll add later.
Step 3: Add Branches in Green
With the same green pen, add small branches to your stems. These should be fine and somewhat sporadic, lending authenticity to your "lavender drawing." This detail is crucial in "ceramic painting," as it adds depth and realism to your work, making the lavender come alive on the ceramic surface.
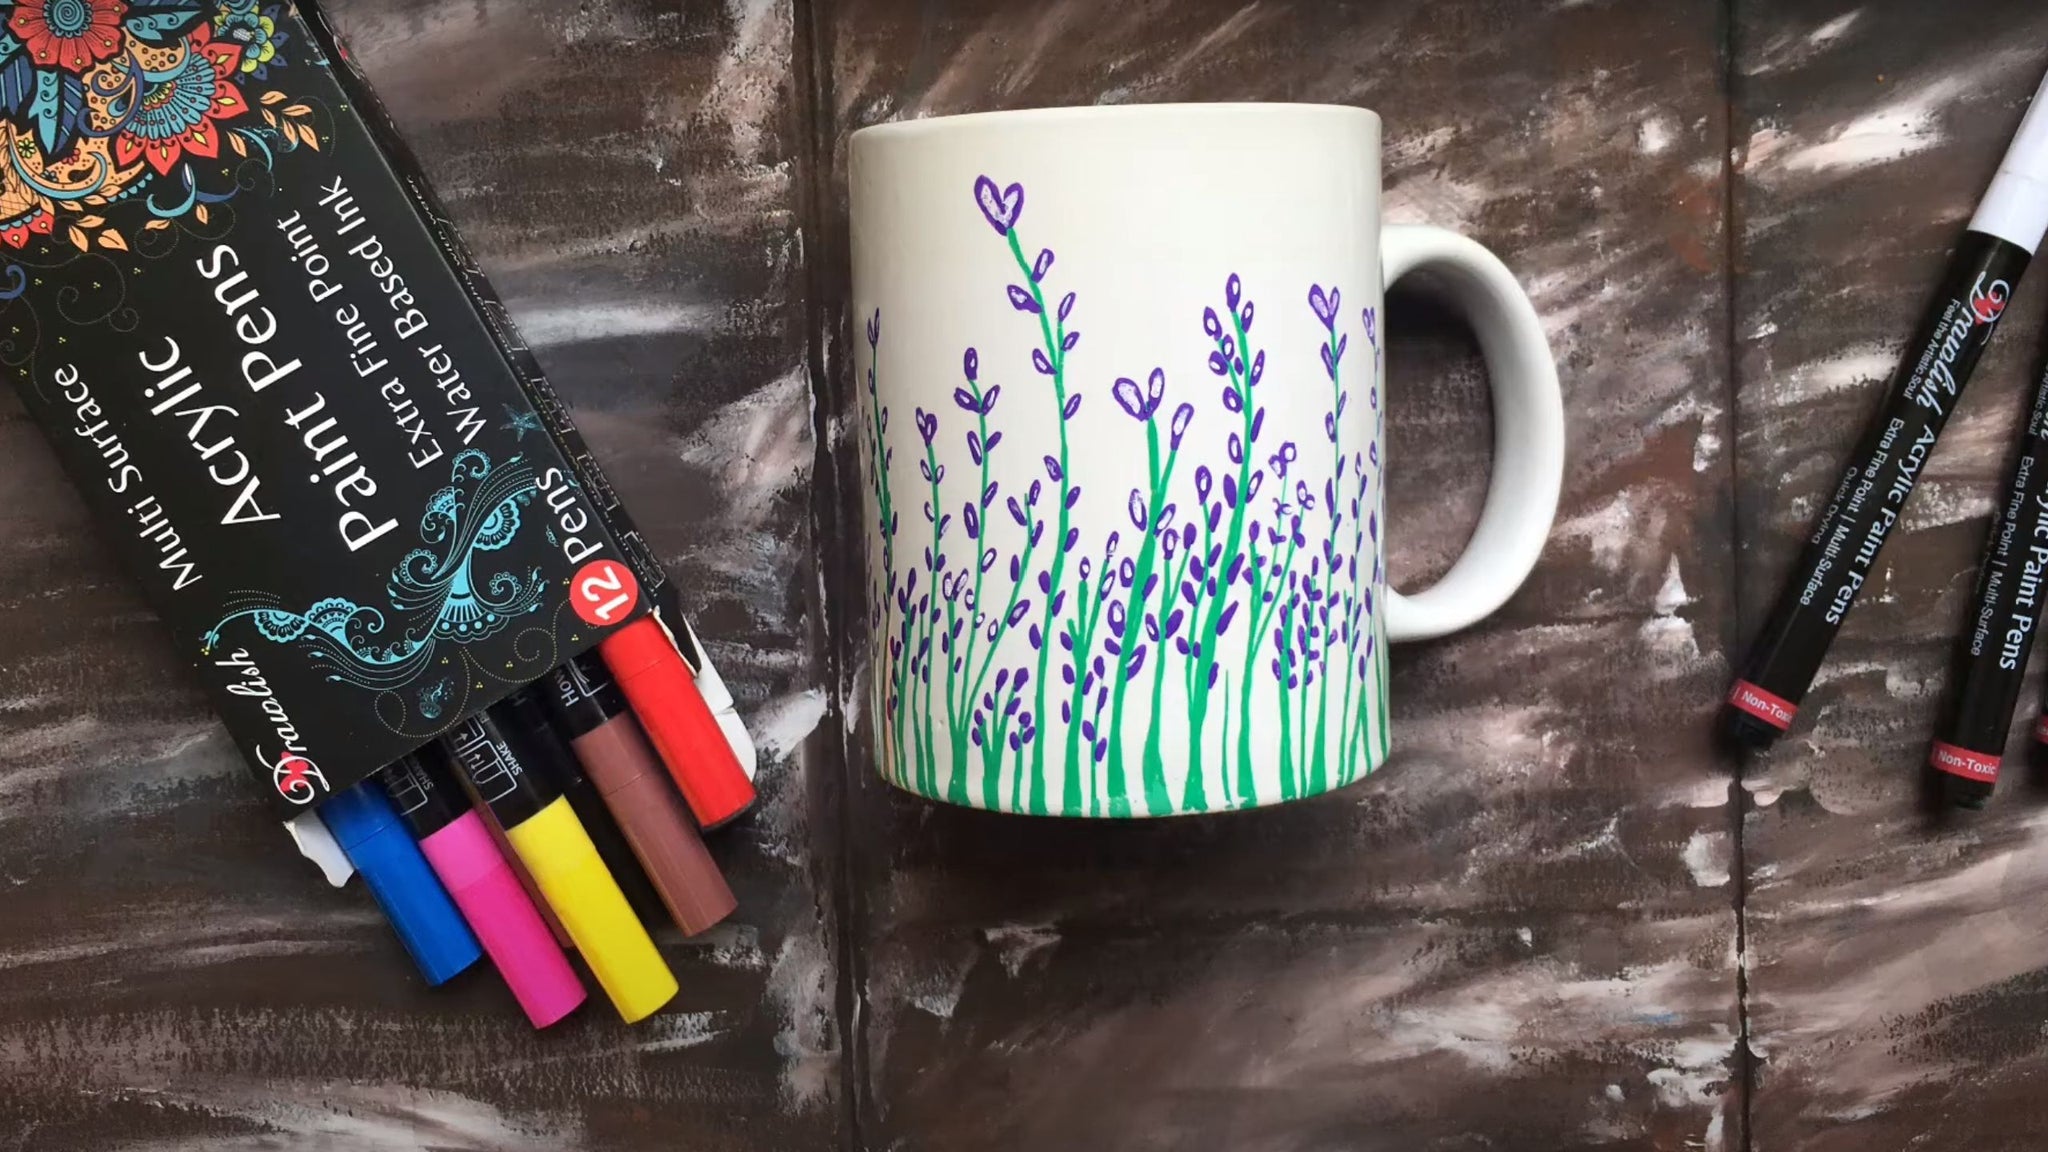
Step 4: Draw Purple Petals on Oval Shapes
Now, the highlight of your "lavender drawing" - the blooms. Switch to a purple pen to add oval shapes atop the branches. These ovals, representing the lavender petals, don't need to be perfect; slight variations add charm and a touch of realism, crucial in "easy ceramic painting ideas."
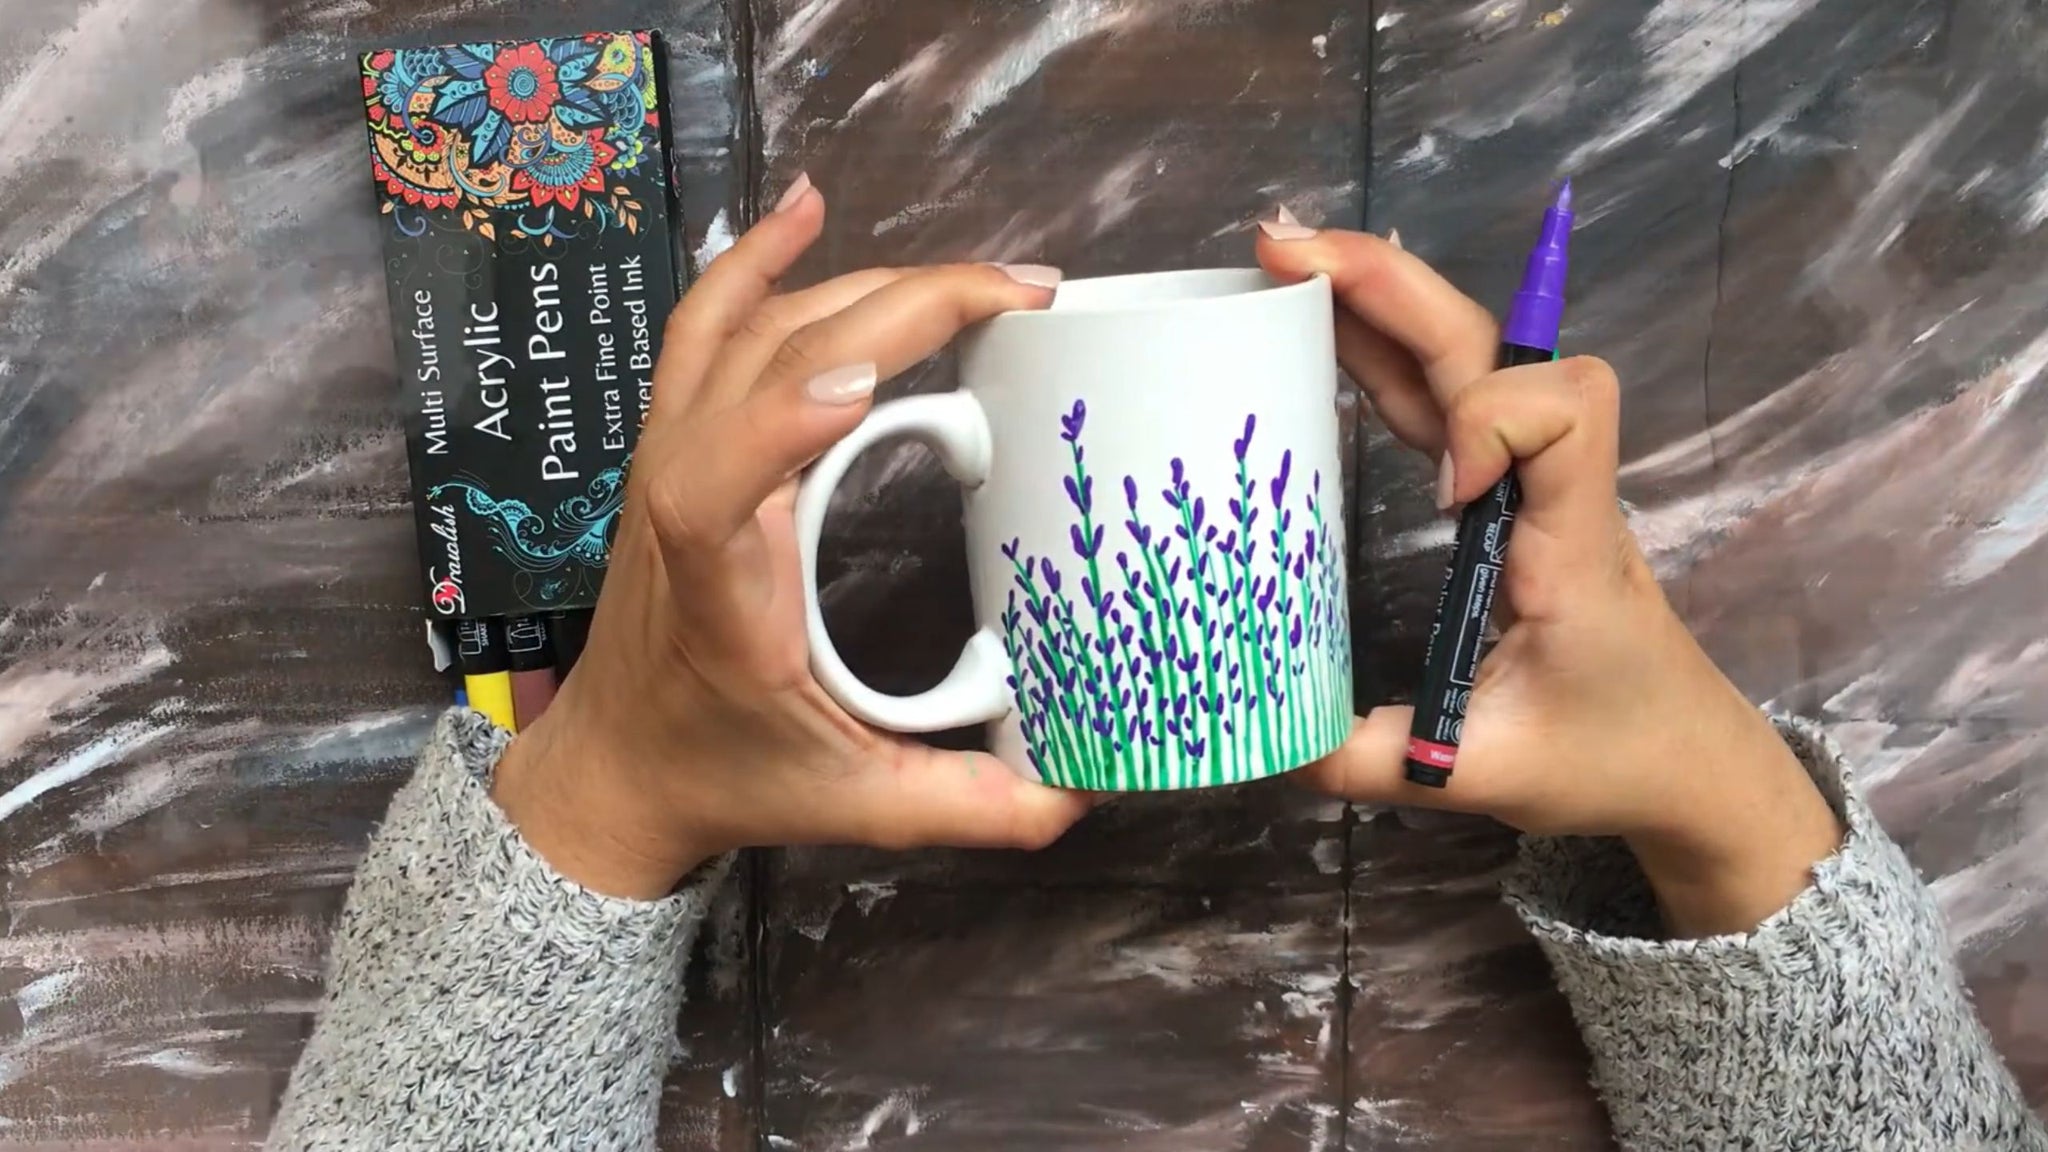
Step 5: Fill the Petals with White, Then Color
For depth and dimension, lightly fill in the purple petals with white using another pen. Before the white dries, blend it slightly with the purple edges. This technique gives your blooms a lifelike appearance, with the white simulating light reflection and the purple offering shadow and depth.
Conclusion: The Joy of Ceramic Painting
So, "can you paint ceramic" and transform it into a masterpiece? Absolutely. This lavender drawing project is a testament to the versatility and joy of ceramic painting. Whether you're new to the craft or an experienced artist, using acrylic paint pens on ceramic offers a world of creative possibilities.
Remember, the essence of "ceramic painting" and "easy ceramic painting ideas" lies in experimentation and personal expression. Don't hesitate to explore different themes, colors, and techniques. With each piece, you'll discover more about the medium, your style, and the endless potential of "how to paint ceramic." So, embrace the process, enjoy the journey, and let your creativity blossom with every stroke.
FAQs on Lavender Drawing on Ceramic
1. What are the best surfaces for ceramic painting with acrylic paint pens?
Acrylic paint pens adhere well to a variety of ceramic surfaces, including glazed and unglazed pottery, tiles, and even glass. For the best results, choose a smooth, clean surface. If the ceramic is glazed, a light sanding may help the paint adhere better.
2. Do I need to seal my artwork after painting?
Yes, sealing your finished artwork with a clear sealant is highly recommended to protect it from moisture, scratches, and fading. You can use a spray-on or brush-on sealant designed for acrylic paint. Make sure the paint is completely dry before applying the sealant.
3. How do I fix mistakes in my drawing?
One advantage of using acrylic paint pens is the ease of making corrections. If the paint is still wet, you can wipe it off with a damp cloth. For dried paint, use a small amount of nail polish remover or a fine sandpaper to gently remove the mistake, then repaint the area.
4. Can acrylic paint pens be used on ceramics that will be used for food or drink?
While acrylic paint pens are great for decorative purposes, they are not recommended for surfaces that will come into direct contact with food or drink. If you're decorating a mug or plate, keep the designs on the outer surface or areas not intended for food contact.
5. How long does it take for the paint to dry?
Acrylic paint pens dry relatively quickly compared to other paint types. Typically, the paint will be dry to the touch within minutes, but it's best to allow at least 24 hours for it to fully cure before handling or sealing the ceramic piece.
6. Are acrylic paint pens safe for children to use?
Most acrylic paint pens are non-toxic and safe for children to use under adult supervision. However, it's important to check the product label for age recommendations and safety information. Ensure that children wear appropriate protective clothing to avoid staining clothes and skin.
7. Can I use acrylic paint pens on outdoor ceramic projects?
Acrylic paint pens can be used on outdoor ceramics, but the artwork needs to be properly sealed with a waterproof sealant to withstand the elements. UV-resistant sealants are also recommended to prevent fading from sunlight exposure.
8. How can I achieve the best precision in my lavender drawing?
For the best precision, use fine-tip acrylic paint pens and practice your design on paper before applying it to the ceramic surface. Keeping the pen at a consistent angle and applying even pressure will help achieve smooth, crisp lines.
By exploring these FAQs, you'll be better prepared to embark on your ceramic painting journey with confidence. Remember, the key to success in any artistic endeavor is patience, practice, and a willingness to learn from each experience. Whether you're decorating a keepsake for yourself or a gift for someone special, your lavender drawing on ceramic will surely be a cherished creation.


Leave a comment